![corsmed_no_clear_space_@16x-1.png]](https://help.corsmed.com/hs-fs/hubfs/corsmed_no_clear_space_@16x-1.png?height=40&name=corsmed_no_clear_space_@16x-1.png)
Clinical cases let you explore real MRI examinations while practicing image interpretation and sequence planning. Each case is built from images acquired on an actual MRI scanner and includes both normal anatomy and a range of pathological findings, so you get a realistic, hands-on learning experience.
Open a clinical case
You can access a clinical case by opening any program where the module is labeled Open Case. This includes:
- Corsmed's MRI Clinical Cases program. You can access the program here.
- Clinical case programs shared with you by your instructor.
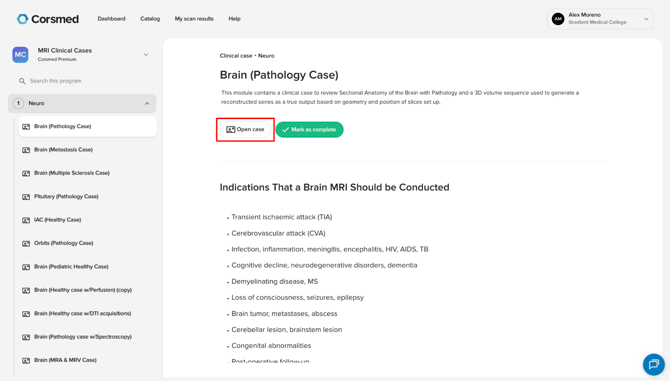
Once you launch a case, the images are already loaded and ready for review. You can find them in the Pulse Sequence List.
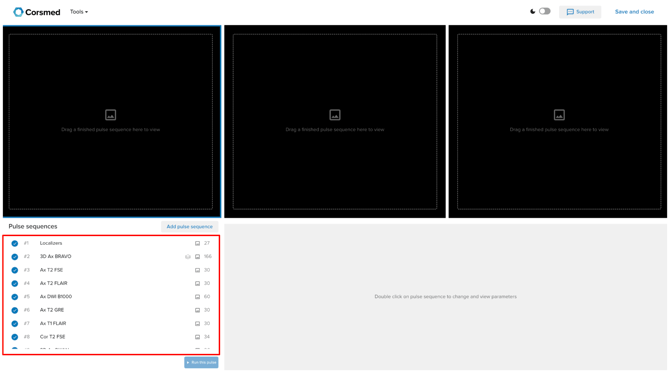
The study contains a collection of MRI sequences that were acquired on a real scanner. To explore them:
- Drag and drop any sequence into a viewport to display it.
- Double-click a sequence to view the acquisition parameters that were used on the real MRI scanner.
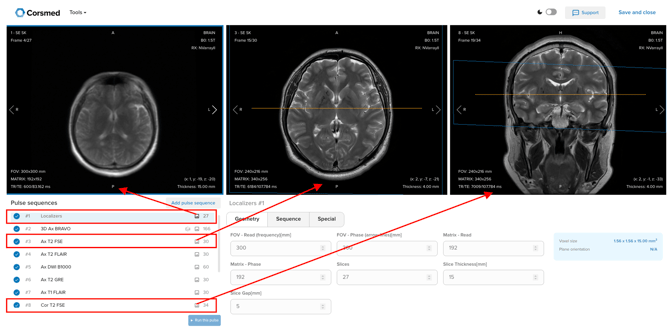
The original clinical case sequences are read-only. These images are provided as reference material and cannot be modified or edited.
Scan a clinical case
Identify which sequences support simulation
Several clinical cases allow you to perform simulations using a dedicated reference sequence.
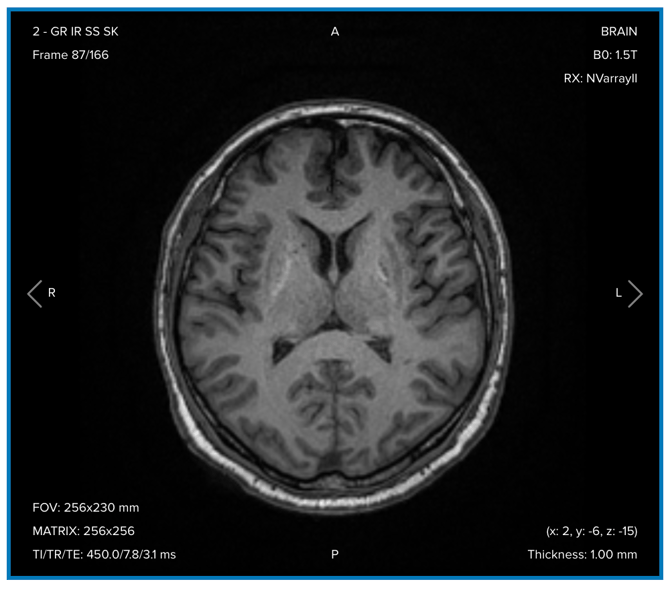
Look for a sequence marked with a paper stack icon. This icon means the sequence supports simulation through multiplanar reconstruction (MPR).
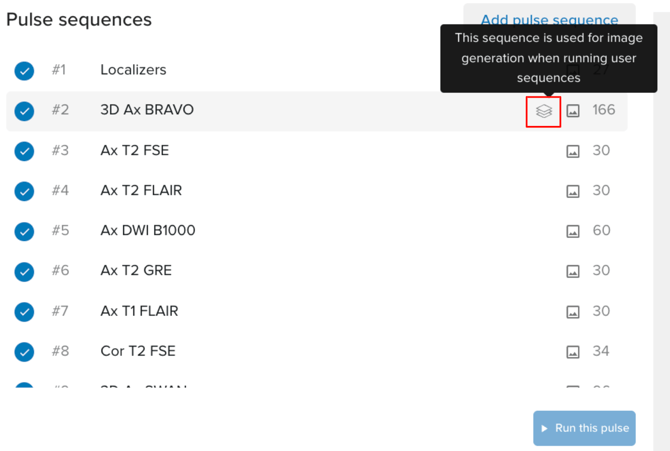
This reference sequence is typically a high-resolution, 3D isotropic acquisition. For example, a 3D Ax BRAVO though the exact pulse sequence varies by case. Depending on the study, it may be a 3D T1-weighted, T2-weighted, GRE, or other volumetric sequence.
Example of a paper stack icon sequence (3D Ax BRAVO):
Plan a new sequence
Click Add Pulse Sequence to create a new simulated acquisition. It appears at the bottom of the pulse sequence list.
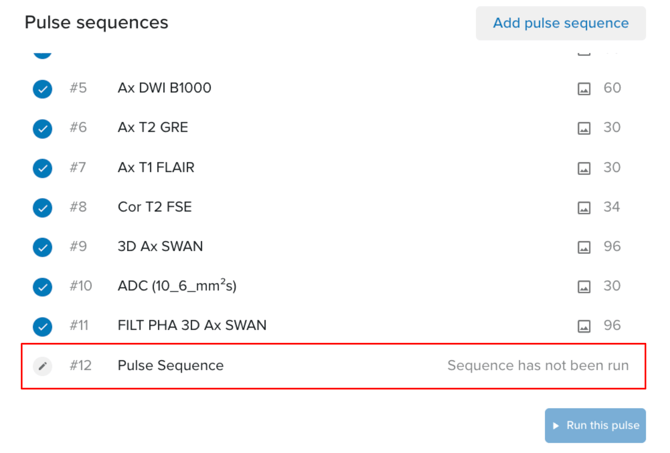
Unlike the original clinical images, this new sequence is fully available for geometric planning. Using the reference sequence as your guide, adjust:
- Scan orientation and angulation
- Slice position and coverage
- Field of View (FOV)
- Matrix size
- Slice thickness
- Slice gap
- Number of slices
This lets you practice planning an acquisition just as you would on a real MRI scanner.
Run the simulation
Run your planned sequence by clicking on Run this pulse.
Corsmed generates a multiplanar reconstruction (MPR) from the underlying high-resolution 3D dataset.
For example, if you create a sagittal brain acquisition using a 3D BRAVO reference sequence, the simulator will reconstruct sagittal images that accurately reflect your prescribed:
- Plane orientation
- Angulation
- Anatomical coverage
- Slice positioning
- Image resolution based on your selected FOV, matrix size, and slice thickness
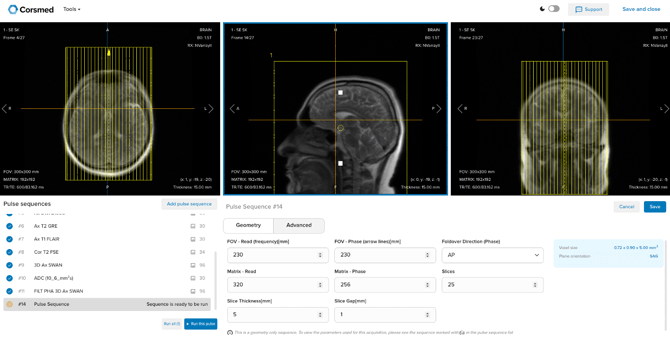
This provides an excellent way to evaluate whether your planning would produce the desired anatomical coverage.
Understand the simulation result
Clinical cases are designed to help you build confidence in MRI planning and positioning using authentic clinical data.
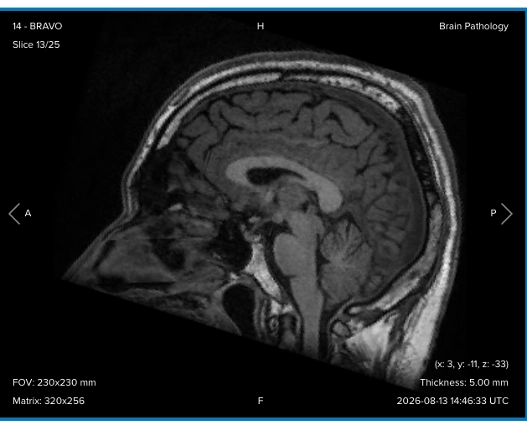
The simulation reproduces the planning and spatial resolution of your prescribed sequence while preserving the original image contrast from the underlying volumetric dataset.
This means the following characteristics are reflected in your results:
- Slice orientation and angulation
- Anatomical coverage
- Slice positions
- Field of View (FOV)
- Matrix size
- Slice thickness and spatial resolution
Example of reconstruction a Sagittal reconstruction of the brain based on the 3D Ax BRAVO sequence:
However, some aspects of MRI acquisition are not simulated in clinical cases, including:
- Image contrast modifications
- Artifacts
- Signal-to-noise ratio (SNR)
- Changes related to pulse sequence timing or acquisition physics