Educational Management Platform V2
Date of issue: 07 March 2023
Introduction
Corsmed AB is pleased to release the latest version of our MRI Educational Management Platform.
The changes in this update focus on making it easier to build great educational content for students and to improve the experience for the students and teachers when using the solution.
General Enhancements
- Labs/Laborations have been renamed to Modules
- There is a new and improved timeout handling. When a simulator window is closed due to inactivity, this is now shown more clearly to the user. You also get the option to continue where you left off and open the closed module.
- PGSE sequence will be removed from Add Pulse Sequence panel. tDWI should be the preferred choice for diffusion techniques.
Teachers Enhancements
1. Manage courses updates
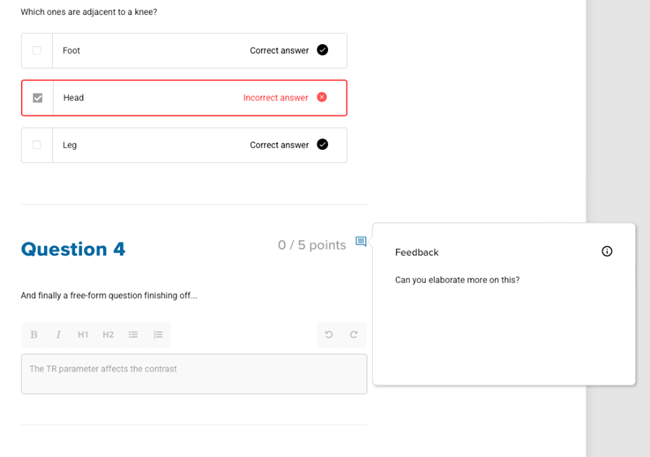
As a student, you can now receive feedback from your teachers directly in the educational tool. As a teacher, you can administer this from “Manage courses”

a. Unpublished modules have a “Publish” button to publish the module. Published modules instead show the “Grade” button, where you can grade your students’ submissions
b. Unpublished modules can be edited using the “Edit”button. Published modules can be previewed using the “Preview” button.
c.You can now reorder the modules within a course by dragging and dropping the cards. This is not possible for courses that have been created by Corsmed.
Text/media areas in the modules have been updated to support rich text editing and additional mediatypes. The following content types are available:
-
- 2 levels of headings
- Bullet points and ordered lists
- Bold/italic signifiers
- Images from files
- Videos from Youtube, Vimeo, Google Drive and Loom
- Undo/Redo functionality

Auto-saving: Modules are now automatically saved as you edit them. You can see the status of the auto save function in the top right corner. Modules need to be published to be visible to students.
The content blockscan be reordered by pressing the up/down arrows at the top right of the block.
To enable scoring of assignments, you are able to set the maximum score on each question when creating the module. This is the maximum amount of points that assignment can be rewarded when grading the submissions for the module.
Remember that a module needs to be published in order to be visible to the students. When a module has been published, you can no longer change the content of that module.
Module names and description can be changed after the module has been published.
3. Grading and feedback
You can reach the grading view by opening the grading window from “Manage courses” for a specific course. You will then see a list of all the students assigned to that module and their respective submissions.
You can also reach the grading view from the “Students” view.

If you click “View” on a student row, you will see the course progress for that student.

If the student has submitted a module, you can click “Review” to grade that module. Note that you need to click “Publish” for the grading to be shown to the user. This allows you to grade all the students for a module and publish to all of them simultaneously.
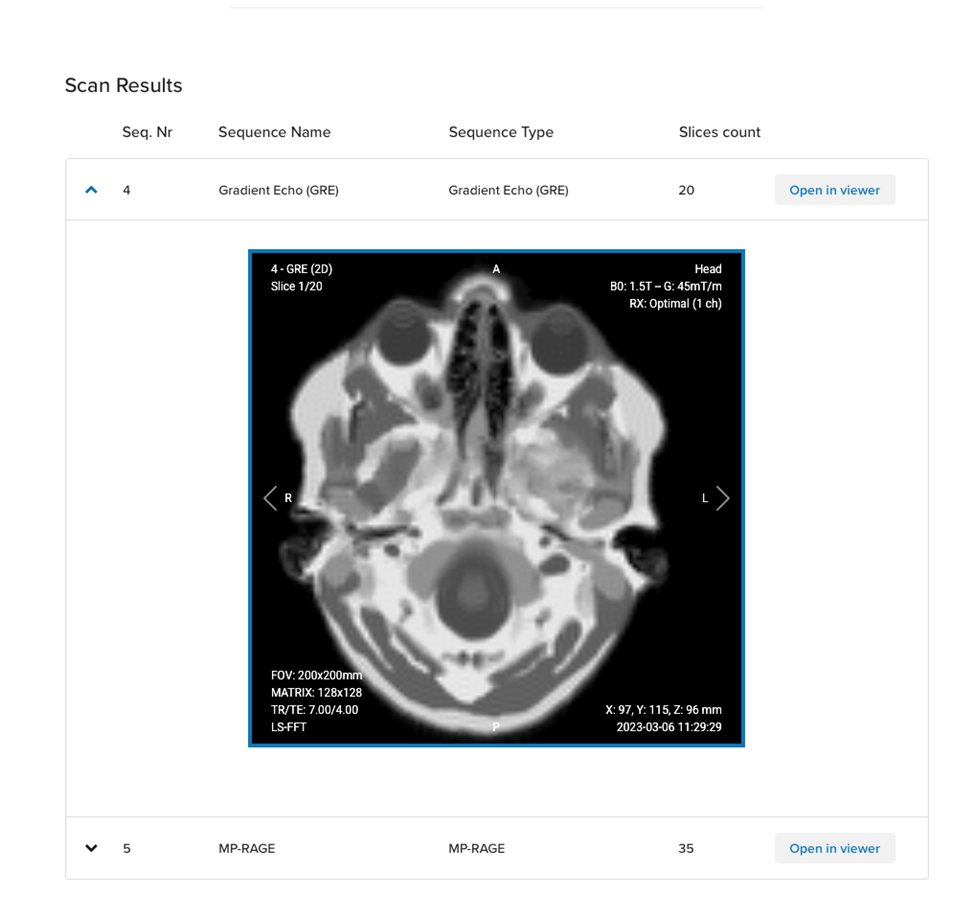
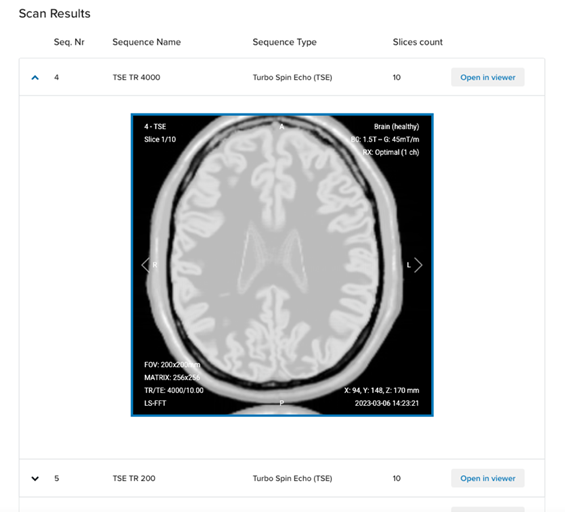
In the bottom of the grading window, you can see a list of all the scan results for the student in that module. This is so that you can get a quick overview and easily access the scan results to assess them. You can open the scan results in the image viewer by clicking “Open in viewer”.
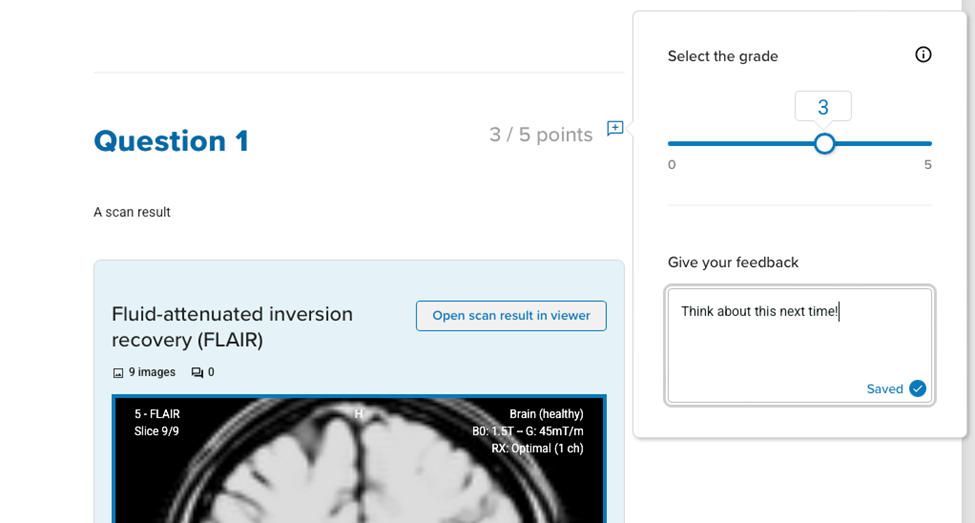
For modules containing quiz assignments, teachers cannow grade and give feedback for each individual question/answer. You do that using the grading popup. This popup is shown when opening the module forgrading. Click the -icon next to a question to show the grading for that question. You can quickly jump to the next question by pressing cmd+enter (mac) or alt+enter (pc).
Students Enhancements
- My courses updates
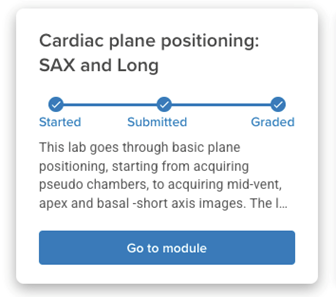
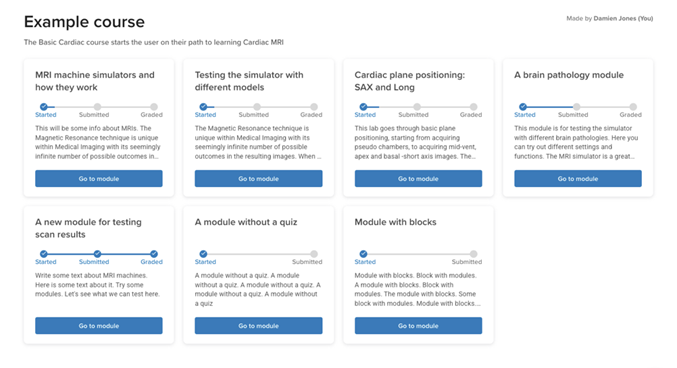 You can now see the current status of each module directly in the my courses view. This makes it easier to see what courses you need to work on and if you have received feedback from your teacher.
Also, the modules now open in a full page, which makes it easier to view the content and improves the workflow when viewing the instructions side by side with the simulator.
2. Working in a module
As a student, you will see the scan results for the current module in the bottom of the module window as you runscans in the simulator.
3. Viewing grades and feedback
If the teacher has published the grading for your module, you will see the“Graded” box ticked in the “My courses” view for that module.
You can then open the module and view the score and feedback provided by the teacher. The feedback and score is shown next to the questions and the total score is provided in the bottom of the page.
